
Disney Princess Carriage Bed Assembly: A Comprehensive Guide
Navigating the assembly of your Rooms To Go Disney Princess Carriage Bed often begins with seeking readily available PDF instructions online, streamlining the setup process.
Understanding the Rooms To Go Disney Princess Carriage Bed
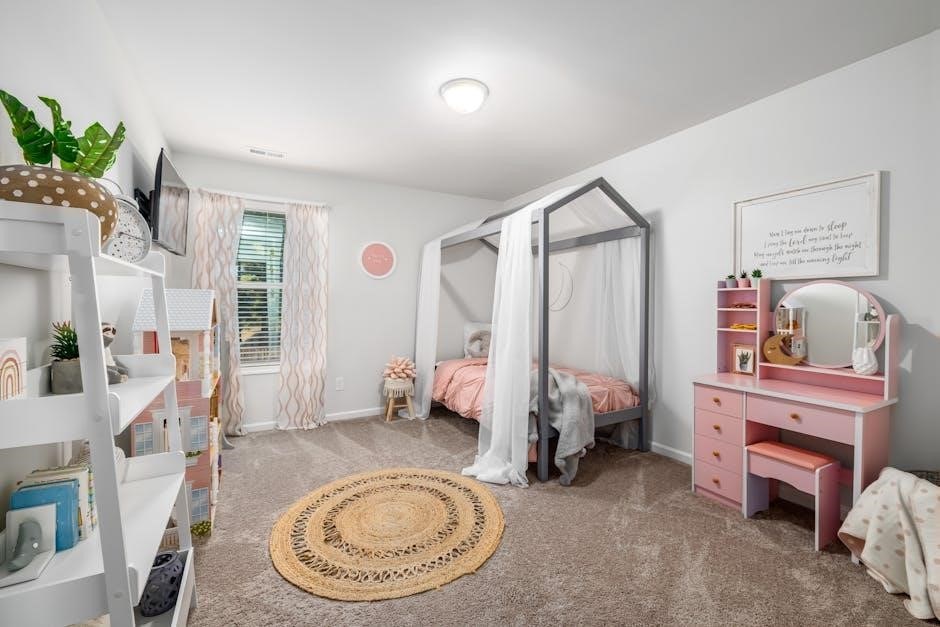
The Rooms To Go Disney Princess Carriage Bed is a popular choice for children’s bedrooms, designed to evoke a fairytale aesthetic. These beds are typically constructed from engineered wood, often featuring molded plastic components to create the carriage shape. Understanding the bed’s construction is crucial before beginning assembly.
Key features often include a decorative headboard and footboard resembling a carriage, side rails for mattress support, and potentially a canopy frame and curtains to complete the princess theme. Some models also incorporate built-in drawers for storage. The bed is designed for a standard twin-size mattress, though compatibility should always be verified.
Before you start, familiarize yourself with the overall design and the various components. Knowing what each piece is called and how it connects will significantly simplify the assembly process, especially when referencing the PDF assembly instructions provided by Rooms To Go.
Availability of PDF Assembly Instructions
Rooms To Go typically provides PDF assembly instructions for their Disney Princess Carriage Bed, often accessible through multiple channels. Initially, check the packaging itself – a physical copy of the instructions is frequently included. If unavailable, the Rooms To Go website is the primary source; navigate to their support or product information section and search for the bed model number.
Alternatively, a direct search online using terms like “Rooms To Go Disney Princess Carriage Bed assembly instructions PDF” can yield results. However, exercise caution when downloading from unofficial sources to avoid potential malware. Rooms To Go’s customer support team can also email you a copy of the PDF if you cannot locate it online.
Having the PDF readily available before starting is highly recommended. It provides a visual guide and a detailed step-by-step process, ensuring a smoother and more accurate assembly experience. Ensure the PDF is for your specific bed model.
Locating the Correct Assembly Manual
Identifying the correct assembly manual for your Rooms To Go Disney Princess Carriage Bed is crucial for a successful build. Begin by locating the model number, typically found on a sticker affixed to the headboard or footboard, or within the original purchase documentation. This number is key when searching online or contacting customer support.
On the Rooms To Go website, utilize the search bar and input the model number alongside “assembly instructions” or “manual.” Filter results to specifically show PDF documents. If multiple versions appear, verify the publication date to ensure you have the most up-to-date instructions.
Carefully review the manual’s cover page to confirm it matches your bed’s specific design and features. Incorrect manuals can lead to missteps and potential damage. If uncertainty persists, contacting Rooms To Go’s customer service with the model number will guarantee you receive the correct documentation.
Rooms To Go Customer Support for Instructions
When online searches for the Disney Princess Carriage Bed assembly PDF prove unsuccessful, Rooms To Go’s customer support team is an invaluable resource. You can reach them via phone, typically listed on their website or your purchase receipt, or through their online chat feature for immediate assistance.
Be prepared to provide the bed’s model number – this is essential for them to quickly locate the correct instructions. Explain that you require a digital copy of the assembly manual, specifically in PDF format, for ease of access and printing.
Alternatively, some Rooms To Go locations may be able to provide a physical copy of the manual. Inquire about this option if you prefer a hard copy. Customer support representatives can also offer guidance if you encounter difficulties during the assembly process, ensuring a smooth and frustration-free experience.

Preparing for Assembly
Before beginning, gather necessary tools, meticulously inventory all parts listed in the PDF, and clear a spacious, safe workspace for efficient assembly.
Tools Required for Assembly
Successfully assembling your Rooms To Go Disney Princess Carriage Bed necessitates a specific toolkit to ensure a smooth and secure build. A Phillips head screwdriver is absolutely essential, likely in multiple sizes, to manage the majority of the screws included. A flathead screwdriver may also be required for certain components or adjustments.
Consider having a rubber mallet on hand; this is incredibly useful for gently tapping pieces together without causing damage, particularly when aligning the frame components. A wrench set, or at least an adjustable wrench, could be needed for tightening bolts, if any are present.
For ease and precision, a power drill with adjustable clutch settings can significantly speed up the process, but use it cautiously to avoid over-tightening and stripping screws. A level is vital to ensure the bed is stable and doesn’t wobble. Finally, having a measuring tape can be helpful for verifying dimensions and alignment during assembly. Reviewing the PDF assembly instructions will confirm the exact tools needed for each step.
Inventory of Parts – Checking the Package Contents
Before commencing assembly of your Rooms To Go Disney Princess Carriage Bed, a meticulous inventory of all parts is crucial. Carefully unpack all components and cross-reference them against the parts list detailed in the PDF assembly instructions. This prevents frustrating delays mid-construction due to missing pieces.
Expect to find headboard and footboard panels, side rails, support slats, canopy frame pieces, curtain rods, and potentially drawer components depending on the model. Hardware, including various screws, bolts, washers, and potentially wooden dowels, will be packaged separately.
Pay close attention to the quantity of each item. Note any discrepancies immediately and contact Rooms To Go customer support. Don’t discard the packaging until you’re certain all parts are present. A thorough check now saves significant time and potential headaches later, ensuring a complete and successful assembly.
Workspace Preparation – Ensuring Adequate Space
Prior to beginning the assembly of your Rooms To Go Disney Princess Carriage Bed, dedicate a spacious and well-lit workspace. Referencing the PDF assembly instructions will highlight the bed’s footprint, guiding your space requirements. Clear the area of any obstructions – furniture, toys, or other items – to allow for unhindered movement around the partially assembled bed.
Protect your flooring with a drop cloth or blanket to prevent scratches during assembly. A large, flat surface is ideal; carpeting can work, but a hard floor offers a more stable base. Ensure sufficient headroom to comfortably work without bumping into overhead fixtures.
Having ample space minimizes the risk of damaging components and streamlines the process. Consider the bed’s final dimensions and ensure the assembly area allows for easy maneuvering during each step. Proper preparation is key to a smooth and efficient build.
Safety Precautions During Assembly
When assembling your Rooms To Go Disney Princess Carriage Bed, prioritizing safety is paramount. Always consult the PDF assembly instructions for specific warnings and guidelines. Adult assembly is strongly recommended, as small parts could pose a choking hazard to children.
Wear safety glasses to protect your eyes from dust or flying debris. Use gloves to prevent splinters and protect your hands. Avoid over-tightening screws, as this can strip the wood or damage components. If using power tools, follow the manufacturer’s safety instructions carefully.
Be mindful of pinch points during assembly, especially when attaching the headboard, footboard, and side rails. Lift with your legs, not your back, when moving heavier pieces. Keep the workspace clear of tripping hazards. If encountering difficulty, stop and re-examine the instructions before proceeding.

Step-by-Step Assembly Process
Following the Rooms To Go PDF instructions, begin with the carriage frame, then attach the headboard, footboard, and side rails sequentially for a secure build.
Assembling the Carriage Frame
Begin by carefully unpacking all frame components, referencing the Rooms To Go PDF assembly guide for accurate identification. Typically, this involves connecting the base pieces – often curved sections – using provided bolts and washers. Ensure proper alignment before fully tightening; a slight misalignment now can cause significant issues later.
The PDF will illustrate the correct orientation of each piece, paying close attention to pre-drilled holes. Use the appropriate Allen wrench or screwdriver (as specified in the instructions) to secure the connections. Avoid over-tightening, which could strip the screw holes or damage the wood.
Once the base is assembled, attach any decorative frame elements, such as the side supports or front arches. Again, consult the PDF for precise placement and fastening instructions. Double-check all connections for stability before proceeding to the next assembly stage. A solid carriage frame is crucial for the bed’s overall structural integrity.
Attaching the Headboard and Footboard
Referencing the Rooms To Go PDF assembly instructions, carefully position the headboard and footboard relative to the assembled carriage frame. These pieces often attach using bolts or screws that insert through pre-drilled holes in both the frame and the headboard/footboard components.
Ensure the decorative sides of the headboard and footboard face outwards before securing them. The PDF will detail the correct bolt size and tightening sequence. It’s vital to align the components precisely to prevent wobbling or instability.
Begin by loosely attaching all bolts, then gradually tighten them in a criss-cross pattern. This ensures even pressure distribution and prevents warping. Double-check that the headboard and footboard are firmly secured and do not exhibit any play. A secure attachment is essential for the bed’s safety and longevity.
Installing the Side Rails
Consult the Rooms To Go PDF assembly guide for specific instructions on attaching the side rails to the headboard and footboard. Typically, side rails connect using metal hooks, brackets, or bolts, sliding into designated slots or aligning with pre-drilled holes.
Carefully align the side rails, ensuring they are flush with both the headboard and footboard. The PDF will illustrate the correct orientation and attachment method. Secure the rails using the provided hardware, tightening screws or engaging locking mechanisms as directed.
Verify that the side rails are firmly attached and level. Any misalignment can compromise the bed’s structural integrity. A properly installed side rail system provides essential support for the slat system and mattress, ensuring a safe and comfortable sleeping surface.
Adding the Slat System for Mattress Support
Refer to the Rooms To Go PDF assembly instructions for guidance on installing the slat system. These slats provide crucial support for the mattress, ensuring comfortable sleep. Typically, slats are wooden or metal and slot into designated supports along the inner sides of the carriage bed frame.
Evenly space the slats across the frame, following the diagram in the PDF. Secure each slat using screws, clips, or by simply resting them within the supports, depending on the bed’s design. Ensure all slats are firmly in place before proceeding.
Proper slat installation is vital for preventing mattress sagging and ensuring even weight distribution. Double-check that all slats are securely fastened and level to create a stable and supportive base for the mattress.
Specific Component Assembly
Detailed PDF instructions from Rooms To Go illustrate assembling unique features like the canopy, curtains, and drawers, enhancing the magical carriage bed experience.
Canopy Frame Installation
The canopy frame installation, as detailed in the Rooms To Go Disney Princess Carriage Bed assembly PDF, typically involves connecting several curved pieces to form the overarching structure. Begin by identifying all canopy frame components, referencing the parts list to ensure everything is present.
Generally, these pieces join using pre-drilled holes and provided screws or bolts. It’s crucial to loosely assemble the frame first, checking for proper alignment before fully tightening the fasteners. Pay close attention to the orientation of each piece; the PDF will illustrate the correct positioning.
Once the frame is assembled, it’s carefully attached to the headboard or designated mounting points on the carriage frame. Securely fasten the canopy frame, ensuring it’s stable and won’t detach during use. Finally, verify all connections are tight and the canopy frame stands upright without wobbling, completing this enchanting addition to the bed.
Curtain Rod Attachment
According to the Rooms To Go Disney Princess Carriage Bed assembly PDF, attaching the curtain rod is a key step in completing the carriage’s fairytale aesthetic. Locate the designated mounting brackets on the interior of the canopy frame – these are usually pre-installed or require simple screw attachment.
Carefully insert the curtain rod ends into these brackets, ensuring they are securely seated. Some models may utilize decorative finials that screw onto the rod ends to prevent slippage. It’s important to gently test the rod’s stability before draping curtains, preventing potential falls.
The PDF instructions will detail the specific bracket type and attachment method for your model. Once secure, you can proceed with hanging the included curtains or your preferred sheer fabrics, transforming the bed into a princess’s dream haven. Double-check all connections for a safe and magical finish.
Drawer Assembly (If Applicable)
If your Rooms To Go Disney Princess Carriage Bed includes under-bed drawers, the assembly PDF will provide dedicated instructions. Begin by identifying all drawer components: side panels, front panel, back panel, and drawer bottom. Typically, the drawer sides connect to the front and back panels using cam locks and dowels, or screws – consult the diagrams carefully.
Once the drawer frame is assembled, slide the drawer bottom into the designated grooves. Ensure it’s fully seated before proceeding. Next, attach the drawer slides to both the drawer sides and the interior of the bed frame, aligning them precisely for smooth operation.
The PDF will illustrate the correct slide placement. Finally, gently insert the assembled drawer into the bed frame, testing the gliding action. Secure any remaining screws and verify the drawer opens and closes effortlessly.
Wheel/Caster Installation
The Rooms To Go Disney Princess Carriage Bed often features casters or wheels for mobility, detailed in the assembly PDF. Locate the pre-drilled holes on the underside of the carriage frame – these are where the casters attach. Typically, installation involves aligning the caster stem with the hole and securing it with screws or bolts provided in the hardware pack.
Ensure each caster is firmly attached and rotates freely. Some models may include locking casters; verify these engage and disengage smoothly to prevent unwanted movement. If the PDF shows washers, use them to distribute the weight and protect the wood.
Double-check that all casters are installed at the same height to avoid wobbling. After installation, test the bed’s maneuverability on a flat surface, confirming smooth rolling and secure locking functionality.

Troubleshooting Common Issues
Addressing assembly hiccups with your Rooms To Go Disney Princess Carriage Bed often involves referencing the PDF for solutions to missing parts or alignment difficulties.
Missing Parts – What to Do
Discovering missing components during the assembly of your Rooms To Go Disney Princess Carriage Bed can be frustrating, but several avenues exist for resolution. First, meticulously re-examine the packaging and all included materials; small parts are sometimes concealed within protective layers.
If a part is genuinely absent, consult the PDF assembly instructions. They often contain a detailed parts list with corresponding codes, aiding in accurate identification of the missing item.
Next, contact Rooms To Go customer support directly. Have your order number, bed model name, and the specific part number (from the PDF) readily available. They typically offer replacement parts, often shipped free of charge. Be prepared to potentially provide photographic evidence of the packaging and included components to support your claim. Retain all documentation related to your request for tracking purposes.
Avoid attempting to substitute parts or modify the bed structure, as this could compromise safety and void any warranty.
Difficulty Aligning Components
Encountering alignment issues during the assembly of your Rooms To Go Disney Princess Carriage Bed is common, particularly with larger pieces. Before applying significant force, double-check that you’re using the correct hardware – screws, bolts, and dowels – as specified in the PDF assembly instructions. Incorrect fasteners can prevent proper seating.
Loosen any already-secured connections in the immediate area. This provides a degree of flexibility, allowing components to shift and align more easily. Gently apply pressure while maneuvering the parts into position; avoid forcing them, which could damage the wood.
Refer closely to the diagrams within the PDF. Pay attention to the orientation of each piece and ensure it matches the illustration. Sometimes, a slight adjustment in angle or rotation is all that’s needed. If persistent, consider having a second person assist, providing extra hands for support and alignment.
Stripped Screws or Damaged Wood
Discovering stripped screws or damaged wood during Rooms To Go Disney Princess Carriage Bed assembly can be frustrating. Immediately stop and assess the damage. Avoid continuing to tighten a stripped screw, as this will worsen the problem. Refer to your PDF assembly instructions for potential replacement parts or contact Rooms To Go customer support.
For minor wood damage, wood glue and clamps can provide a temporary fix, allowing the assembly to proceed cautiously. However, this is not a long-term solution. If a screw hole is stripped, consider using a slightly larger screw or a wood filler to create a new, secure hold.
Always use the correct screwdriver size and apply even pressure. Over-tightening is a primary cause of stripping. If encountering consistent issues, double-check the PDF for torque specifications or recommended tools. Prioritize preventing further damage over forcing the assembly.
Addressing Wobbling or Instability

If your assembled Rooms To Go Disney Princess Carriage Bed exhibits wobbling or instability, a systematic approach is crucial. First, re-examine the PDF assembly instructions to ensure all connections are correctly tightened. Pay close attention to the side rails, headboard, and footboard attachments – these are common sources of instability.
Check that all screws are fully seated and haven’t stripped. Gently tighten each connection, but avoid over-tightening. If wobbling persists, inspect the floor surface; an uneven floor can contribute significantly. Consider using furniture levelers under the bed’s legs or casters to compensate for floor imperfections.
Verify the slat system is properly installed and securely supports the mattress. A loose or improperly placed slat can cause significant wobble. If issues remain, contact Rooms To Go customer support; they may offer specific guidance or replacement parts.

Post-Assembly Checks & Maintenance
Ensure a final inspection confirms all components are tightly secured, guaranteeing stability and safety for your child’s Disney Princess Carriage Bed.

Final Inspection for Tightness and Stability
Following the complete assembly of your Rooms To Go Disney Princess Carriage Bed, a meticulous final inspection is paramount for ensuring both safety and longevity. Begin by systematically checking every screw, bolt, and connection point throughout the entire structure. Gently attempt to wiggle each component – the headboard, footboard, side rails, slats, canopy frame, and any attached drawers – to identify any looseness.
Retighten any fasteners that exhibit even slight movement. Pay particular attention to the points where the frame connects, as these areas bear the most weight. Verify the stability of the bed by applying gentle pressure to different sections; it should remain solid and not wobble. Confirm the secure attachment of the canopy and curtains, ensuring they won’t pose a hazard. Finally, double-check the wheel or caster installation, guaranteeing smooth and safe mobility if applicable. A thorough inspection now prevents potential issues later.
Mattress Compatibility and Recommendations
Selecting the appropriate mattress for your Rooms To Go Disney Princess Carriage Bed is crucial for both comfort and safety. Generally, this bed frame is designed to accommodate a standard twin-size mattress, though verifying the exact dimensions in your assembly manual is always recommended. The ideal mattress thickness typically falls between 6 and 8 inches, ensuring sufficient support without compromising the carriage’s aesthetic appeal.
Consider a mattress with firm support to provide optimal stability, especially for younger children. Avoid excessively thick or heavy mattresses, as they may strain the frame or interfere with the canopy and curtain attachments. Prioritize mattresses certified for safety and low VOC emissions, creating a healthier sleep environment; Regularly check the mattress for proper fit and support, and always follow the manufacturer’s guidelines for care and maintenance to prolong its lifespan.
Cleaning and Care Instructions for the Bed
Maintaining the enchanting appearance of your Rooms To Go Disney Princess Carriage Bed requires regular, gentle cleaning. For the painted surfaces, use a soft, damp cloth with mild soap and water; avoid abrasive cleaners that could scratch or dull the finish. Dust frequently with a microfiber cloth to prevent buildup. The canopy and curtains, if fabric, may require occasional spot cleaning or gentle hand washing, following the fabric’s care label.
Inspect the bed frame periodically for loose screws or bolts, tightening them as needed to ensure stability. Avoid placing heavy objects on the bed that could strain the structure. Protect the bed from direct sunlight and excessive moisture, which can damage the finish. Regularly vacuum around and under the bed to prevent dust accumulation and maintain a clean sleep environment. Proper care will preserve the magical charm of this special piece for years to come.
Long-Term Maintenance Tips
To ensure the longevity of your Rooms To Go Disney Princess Carriage Bed, implement a consistent maintenance schedule. Annually, thoroughly inspect all connections – screws, bolts, and joints – and re-tighten as necessary. Periodically check the slat system supporting the mattress, replacing any damaged or worn slats promptly to maintain proper support. Protect the bed from extreme temperature fluctuations and humidity, as these can affect the wood and finish.
Consider applying a furniture polish specifically designed for painted surfaces every six months to preserve the luster and protect against scratches. Regularly rotate the mattress to promote even wear and tear. When cleaning, always test any cleaning solution in an inconspicuous area first. By following these simple steps, you’ll safeguard your investment and keep the fairytale magic alive for your little princess for years to come.