Fluke 179 Meter Manual: A Comprehensive Guide
This guide details the Fluke 179 True RMS DMM, covering setup, operation, troubleshooting, and comparisons to related models like the 175 and 177.
The Fluke 179 is a professional-grade True RMS digital multimeter renowned for its accuracy, reliability, and durability. As part of the Fluke 170 Series – alongside the 175 and 177 – it’s a staple for electricians, technicians, and engineers. This meter excels in demanding environments, undergoing rigorous testing to ensure consistent performance.
It’s designed for a wide range of electrical measurements, including voltage, current, resistance, frequency, and temperature (when paired with the 80BK temperature probe). Fluke Corporation, a global leader in test tools, prioritizes portability, safety, and ease of use in its products. The 179 offers both Auto and Manual ranging, providing flexibility for various applications and user preferences. This manual provides a comprehensive overview of its features and functions.
Understanding True RMS Measurement
True RMS (Root Mean Square) measurement is crucial for accurately assessing AC signals, especially non-sinusoidal waveforms. Traditional multimeters often provide inaccurate readings with distorted AC signals, as they assume a perfect sine wave. The Fluke 179, however, utilizes True RMS technology to calculate the actual heating value of an AC signal, regardless of its shape.
This is vital for applications involving complex loads or variable frequency drives where waveforms deviate significantly from a sine wave. True RMS provides a more representative measurement of the signal’s power, ensuring reliable results. The Fluke 179’s ability to perform True RMS measurements distinguishes it as a professional-grade instrument capable of handling diverse electrical scenarios.
Key Features of the Fluke 179 DMM
The Fluke 179 is a professional-grade digital multimeter renowned for its accuracy and reliability. Key features include True RMS measurement for precise AC signal analysis, even with distorted waveforms. It boasts automatic and manual ranging, offering flexibility for various applications.
A built-in continuity buzzer provides quick verification of circuit connections, while the diode test function aids in semiconductor analysis. The Fluke 179 also includes frequency measurement capabilities and a temperature measurement function when paired with the optional 80BK temperature probe; Its robust design ensures durability, making it suitable for demanding field use. Fluke’s commitment to quality ensures a dependable tool for professionals.
Accuracy and Precision Specifications
The Fluke 179 delivers high accuracy and precision, crucial for reliable measurements. DC Voltage accuracy is typically ±0.06%, while AC Voltage accuracy reaches ±0.7% (depending on frequency). DC Current measurements boast ±0.5% accuracy, and AC Current, ±1.0%.
Resistance measurements offer ±0.2% accuracy. Frequency measurement accuracy is specified at ±0.1%. These specifications are maintained within a defined temperature range, typically 18°C to 28°C, with adjustments for temperature coefficients provided in the full technical data sheet. Fluke rigorously tests these meters to ensure they meet stringent performance standards, providing confidence in every reading. Detailed specifications are available in the official Fluke documentation.
Safety Features and Ratings

The Fluke 179 is designed with user safety as a paramount concern. It’s fully IEC 1010-1 CAT III 600V safety rated, providing protection in various electrical environments. The meter features robust fusing for each measurement range, safeguarding against overloads and potential damage.

It also includes reinforced insulation, minimizing the risk of electric shock. The test leads are safety-rated to match the meter’s category. Fluke emphasizes the importance of using only approved test leads and accessories. Always adhere to standard safety procedures when working with electrical circuits. Refer to the complete safety manual for detailed guidelines and warnings regarding safe operation.
Setting Up the Fluke 179
Initial setup of the Fluke 179 is straightforward. Begin by inspecting the meter and accessories for any physical damage. Ensure the battery is correctly installed – see the dedicated battery section for details. Connect the test leads to the appropriate input jacks: COM (common), and the voltage/current/resistance jack.
If using the optional 80BK temperature probe, connect it to the temperature input. Before making any measurements, perform a continuity check of the test leads to verify connection integrity. Familiarize yourself with the function selector dial and button layout for efficient operation. Always double-check connections before energizing any circuit.
Battery Installation and Replacement
The Fluke 179 operates on 9V alkaline batteries. To access the battery compartment, locate the battery cover on the rear of the meter. Remove the cover, typically by unscrewing a small screw. Install a fresh 9V battery, observing the correct polarity (+ and -) as indicated inside the compartment.
A low battery indicator on the display signals the need for replacement. Always replace the battery when the low battery symbol appears to ensure accurate measurements. Dispose of used batteries responsibly, following local regulations. Incorrect battery installation can damage the meter; double-check polarity before closing the compartment.
Probe Selection and Connection
The Fluke 179 utilizes standard shrouded test leads for safe and accurate measurements. Ensure the probes are securely connected to the appropriate input jacks on the meter’s front panel. The black probe connects to the COM (common) jack, while the red probe connects to the VΩmA jack for voltage, resistance, and current measurements.
For higher current measurements, utilize the dedicated current input jack. Always inspect probes for damage – cracked insulation or broken connectors – before use. Replace damaged probes immediately. Proper probe connection is crucial for obtaining reliable readings and maintaining user safety.
Basic Measurement Functions
The Fluke 179 excels at fundamental electrical measurements. Voltage (AC and DC) is measured by connecting the probes in parallel with the circuit. Current (AC and DC) requires breaking the circuit and inserting the meter in series. Resistance is measured with the circuit de-energized, ensuring no voltage is present.
The meter automatically selects the appropriate function based on the dial position. Understanding these core functions is essential for troubleshooting and verifying electrical systems. Always double-check the dial position before making a measurement to avoid incorrect readings or potential damage to the meter or the circuit under test.
Voltage Measurement (AC/DC)
To measure DC Voltage, set the dial to the DC voltage range (V DC). Connect the black probe to the common (COM) terminal and the red probe to the V/Ω/mA terminal. Place the probes in parallel with the component or circuit you wish to measure. For AC Voltage, select the AC voltage range (V AC) on the dial. The connection procedure remains the same – parallel placement of the probes.
The Fluke 179 automatically ranges, but manual ranging is also available. Pay attention to the display; exceeding the selected range can lead to inaccurate readings. Always exercise caution when measuring voltage, especially in high-voltage environments.
Current Measurement (AC/DC)
Measuring current requires a different connection method than voltage. For DC Current (A DC), connect the black probe to COM and the red probe to the A/mA terminal for currents under 200mA, or the A terminal for higher currents. For AC Current (A AC), select the appropriate AC current range on the dial and follow the same probe connections.

Crucially, current measurements must be done in series with the circuit. Break the circuit and insert the meter into the current path. Incorrect connections can blow the fuse. The Fluke 179 offers both auto and manual ranging for current measurements; select the appropriate mode for your needs.
Resistance Measurement
To measure resistance, ensure the power to the circuit is completely OFF. Connect the black probe to the COM terminal and the red probe to the Ω (Ohm) terminal. Select the resistance range on the rotary dial. The Fluke 179 offers both manual and auto-ranging for resistance measurements, allowing for precise readings.

For accurate results, isolate the resistor if possible. Parallel circuits can affect the reading. The display will show the resistance value in Ohms (Ω), kiloOhms (kΩ), or megaOhms (MΩ), depending on the selected range. Note that the meter applies a small voltage during resistance measurement.
Advanced Measurement Functions
Beyond basic measurements, the Fluke 179 offers several advanced functions. These include continuity testing, indicated by a beeper when resistance is below a certain threshold, and a diode test function to check diode functionality by applying a voltage.
Frequency measurement allows determining the frequency of AC signals. The 179 also supports temperature measurement when used with the optional 80BK temperature probe, displaying readings in Celsius or Fahrenheit. Utilizing these features expands the meter’s diagnostic capabilities, making it a versatile tool for various electrical applications.
Continuity Testing
The Fluke 179’s continuity function quickly assesses if a complete electrical path exists. When activated, the meter applies a small test voltage and audibly signals – via a beeper – if the resistance between the test leads falls below approximately 30 ohms. This is incredibly useful for checking switches, fuses, and wiring connections.
A visual indication on the display complements the audible tone. Remember to disconnect power from the circuit being tested before performing a continuity check to avoid damaging the meter or creating a safety hazard. This function simplifies troubleshooting and confirms circuit integrity efficiently.
Diode Test
The Fluke 179’s diode test function allows you to check the functionality of diodes and other semiconductor devices. It applies a forward voltage across the diode and measures the forward voltage drop – typically between 0.5V and 0.8V for silicon diodes. A reading of ‘OL’ (Overload) in one direction and a voltage drop in the other indicates a good diode.
Reverse biasing should show an open circuit (OL). A shorted diode will display a near-zero voltage drop in both directions. This test helps identify faulty diodes within circuits. Always ensure the circuit is de-energized before testing diodes, and remember polarity is crucial for accurate results.
Frequency Measurement
The Fluke 179’s frequency measurement function determines the number of cycles per second (Hertz) of an AC signal. To utilize this, select the frequency measurement mode and connect the test leads appropriately to the signal source. The meter automatically detects and displays the frequency, ranging from a few Hertz to several megahertz.
Accuracy is dependent on signal amplitude and waveform quality. Ensure a clean, stable signal for reliable readings. The display shows the frequency value with the appropriate unit (Hz, kHz, MHz). This function is invaluable for analyzing AC power systems, electronic circuits, and signal generators, aiding in troubleshooting and verification.
Manual vs. Auto Range Mode
The Fluke 179 offers both Auto Range and Manual Range modes for versatile measurement control. In Auto Range, the meter automatically selects the optimal measurement range, providing convenience and simplifying operation for general use. However, Manual Range allows the user to specify the range, offering greater precision and control when measuring weak or specific signals.
Selecting Manual Range is beneficial when signal levels are known or when maximizing resolution is crucial. The display indicates “Manual Range” when this mode is active. Users can then adjust the range up or down to achieve the desired level of detail. Understanding both modes empowers users to optimize measurements for various applications.
Selecting the Appropriate Range
When utilizing Manual Range on the Fluke 179, careful range selection is vital for accurate readings. Begin by estimating the expected value of the quantity being measured. If unsure, start with the highest range and progressively decrease it until a stable and meaningful reading is obtained. This prevents overload and ensures optimal resolution.
Consider the signal’s expected magnitude; a range too high will diminish sensitivity, while a range too low may cause an overload indication. The goal is to choose a range where the measured value occupies a significant portion of the display, maximizing precision. Proper range selection directly impacts the reliability and usefulness of your measurements.
Understanding Manual Range Display
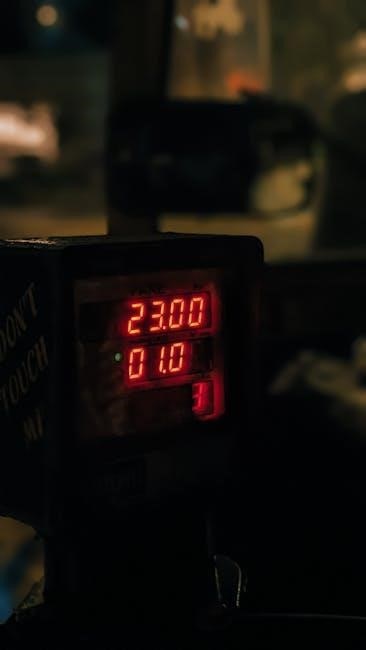
In Manual Range mode on the Fluke 179, the display clearly indicates the selected range. When you adjust the range selector knob, the display will show “Manual Range” alongside the currently chosen unit (e.g., mV, V, mA, Ω). This confirmation is crucial; always verify the displayed range matches your intended measurement setting.
If the measured value exceeds the selected range, the display will typically show “OL” (Overload). This signals the need to increase the range. Conversely, if the reading is very small and lacks sufficient resolution, decrease the range for improved accuracy. Paying attention to the Manual Range display ensures you’re operating within the meter’s capabilities.
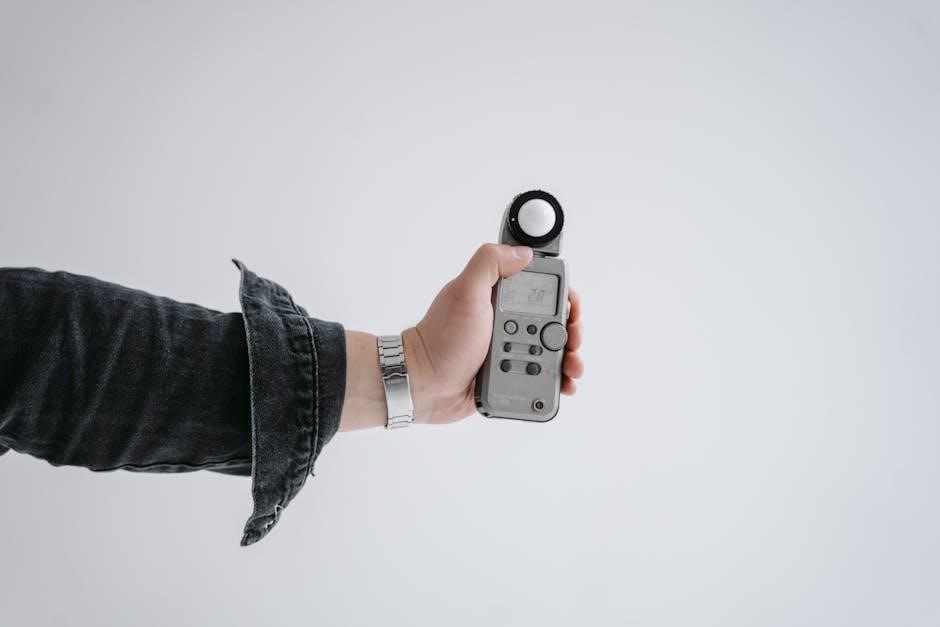
Using the Temperature Probe (80BK)
The Fluke 179, when paired with the 80BK Temperature Probe, enables non-contact temperature measurements. Connect the probe to the meter’s input jack. Ensure a secure connection for accurate readings. Select the temperature function on the Fluke 179; it will automatically recognize the 80BK probe.
Point the probe towards the target surface. The display will show the measured temperature in Celsius or Fahrenheit, depending on your settings. Be mindful of the probe’s distance-to-spot ratio for optimal accuracy – a greater distance requires a larger target area. The 80BK probe expands the Fluke 179’s capabilities beyond standard electrical measurements.
Temperature Measurement Range
When utilizing the 80BK temperature probe with the Fluke 179, the measurement range extends from -40°C to 150°C (-40°F to 302°F). This broad range accommodates diverse applications, from HVAC diagnostics to industrial equipment monitoring.
Accuracy is influenced by factors like surface emissivity and distance. The probe’s specifications detail the accuracy within this range, typically ±2.2°C or ±2% of reading, whichever is greater. Beyond these limits, readings may become unreliable. Always verify probe condition and proper usage for optimal results. Understanding the temperature range ensures appropriate application and reliable data acquisition.
Calibration Considerations
Maintaining the Fluke 179’s accuracy requires periodic calibration. Fluke recommends annual calibration, or more frequently with heavy use or harsh environments. Calibration ensures measurements align with traceable standards, vital for professional applications.
Fluke Corporation offers calibration services, or users can utilize accredited third-party calibration labs. Calibration involves adjusting internal components to meet published specifications. Attempting self-calibration without proper equipment and expertise is discouraged. Regular calibration guarantees reliable performance and adherence to quality control standards, preserving the instrument’s value and trustworthiness over its lifespan.
Troubleshooting Common Issues
Display errors on the Fluke 179 often indicate low batteries or a blown fuse. Check battery condition first, replacing if necessary. If a fuse is blown, replace it only with a Fluke-approved fuse of the correct rating to avoid damaging the meter.
Inaccurate readings may stem from incorrect probe connections or range selection. Ensure probes are firmly seated and the appropriate function and range are chosen. If problems persist, consult the manual for specific error codes and solutions. Avoid attempting internal repairs; contact Fluke support or a qualified technician for complex issues.

Display Errors and Solutions
The Fluke 179’s display can show various error messages indicating specific problems. “OL” signifies an overload – the measured value exceeds the selected range; increase the range or reduce the input. A low battery is often indicated by a battery symbol. If the display appears blank, verify battery installation and fuse integrity.
If “Manual Range” appears unexpectedly, the meter is in manual ranging mode. Press the Range button to switch to Auto Range. For other unusual displays, consult the Fluke 179 manual’s troubleshooting section for detailed explanations and recommended corrective actions. Always prioritize safety and avoid operating the meter with a faulty display.
Fuse Replacement Procedures
Before replacing any fuse on the Fluke 179, disconnect all test leads and power sources. Locate the fuse compartment on the rear of the meter. Use a Phillips head screwdriver to remove the compartment cover. Carefully inspect the old fuse; never replace a blown fuse with one of a higher rating.
The Fluke 179 utilizes different fuse types for various functions. Ensure you use the correct replacement fuse (specified in the manual). Gently remove the blown fuse and insert the new one, ensuring proper orientation. Replace the fuse compartment cover and tighten the screw. Incorrect fuse replacement can damage the meter and void the warranty.
Fluke 179 vs. Other Models (175, 177)
The Fluke 179, 177, and 175 are all True RMS digital multimeters, but differ in features and price. The 179 includes an 80BK temperature probe, offering expanded measurement capabilities not found in the base 175 or 177 models. The 177 provides a broader set of functions compared to the 175, including frequency and capacitance measurement.
Generally, the 179 is positioned as the premium option, offering the most comprehensive feature set. The 177 strikes a balance between features and cost, while the 175 is the most economical choice for basic electrical testing. All models share Fluke’s reputation for durability and accuracy, making them suitable for professional use.
Comparative Analysis
A direct comparison reveals key distinctions between the Fluke 175, 177, and 179. The 179 stands out with its bundled 80BK temperature probe, enabling immediate temperature measurements without additional purchases. The 177 offers expanded measurement capabilities – frequency and capacitance – absent in the 175, providing greater versatility for a moderate price increase.
Accuracy specifications are largely consistent across the series, ensuring reliable readings. However, the 179’s inclusion of the temperature probe justifies its higher cost for professionals requiring thermal analysis. Choosing between the 177 and 175 depends on the need for advanced functions; the 177 is ideal for broader applications.
Choosing the Right Model for Your Needs
Selecting the optimal Fluke model hinges on your specific application. If temperature measurements are frequent and crucial, the 179, with its included 80BK probe, is the clear choice, offering immediate functionality. For general electrical troubleshooting, the 177 provides a robust feature set – including frequency and capacitance – at a reasonable price point.
Budget-conscious users prioritizing essential measurements will find the 175 sufficient. Consider the environments where you’ll be working; all models boast Fluke’s renowned durability. Prioritize features – temperature, capacitance, frequency – and budget to determine the best fit. Fluke’s commitment to quality ensures reliable performance across the series.
Fluke Corporation and Product Support
Fluke Corporation stands as a global leader in professional electronic test tools and software. Renowned for portability, safety, and accuracy, Fluke instruments adhere to rigorous quality standards, ensuring dependable performance for professionals worldwide. Their commitment extends beyond product creation to comprehensive customer support.
Users can access extensive resources, including detailed manuals, technical data, and troubleshooting guides, directly from the Fluke website. Warranty information for the 179 and other models is readily available online. Fluke also provides a network of authorized service centers for repairs and calibration. Dedicated support teams are available to assist with any product-related inquiries, solidifying Fluke’s dedication to customer satisfaction.
Warranty Information
Fluke Corporation provides a limited warranty on the 179 True RMS DMM, safeguarding against defects in materials and workmanship. The standard warranty period typically extends for one year from the date of purchase, though specific terms can vary by region and reseller. This warranty covers repair or replacement of the unit, at Fluke’s discretion.
The warranty does not cover damage resulting from misuse, unauthorized modifications, accidents, or normal wear and tear. Proof of purchase is required for all warranty claims. Detailed warranty information, including claim procedures and exclusions, is available on the official Fluke website and within the product documentation. Registering your 179 online can streamline the warranty process.

Accessing Additional Resources
Fluke Corporation offers a wealth of support materials beyond the printed manual for the 179 DMM. The official Fluke website (www.fluke;com) provides downloadable user manuals, technical data sheets, and quick reference guides in multiple languages.
Users can also find helpful application notes, troubleshooting tips, and video tutorials demonstrating various measurement techniques. Fluke’s online community forums allow users to connect with peers and experts to share knowledge and resolve issues. Furthermore, Fluke provides access to calibration services and a network of authorized service centers for repairs and maintenance. Contacting Fluke’s customer support team directly offers personalized assistance.