Masterbuilt Smoker User Manual: A Comprehensive Guide
Masterbuilt smokers offer convenient BBQ, especially for beginners․ Models like the 20070910 and 20070210 are popular․
This guide covers setup, operation, and maintenance for optimal smoking results․
Masterbuilt smokers have become a popular choice for both novice and experienced BBQ enthusiasts, offering a blend of convenience and capability․ These electric smokers, such as the Masterbuilt 20070910 and 20075315, simplify the smoking process, making it accessible to a wider audience․ Unlike traditional charcoal or propane smokers, Masterbuilt models provide consistent temperature control with minimal effort․
The appeal lies in their ease of use – a significant advantage for beginners venturing into the world of smoked meats․ Features like digital controllers with remote access and timers, found in some models, further enhance the user experience․ However, even simpler analog versions like the Masterbuilt 20070210 deliver reliable results․
This guide will delve into the specifics of operating and maintaining your Masterbuilt smoker, ensuring you achieve delicious, perfectly smoked BBQ every time․ We’ll address common concerns, like optimizing smoke flavor and troubleshooting potential issues, to help you maximize your smoking potential․
Understanding Your Masterbuilt Model
Masterbuilt offers a diverse range of electric smokers, each with unique features․ Identifying your specific model – like the 20070910, 20075315, or 20070210 – is crucial for proper operation․ Key components include the heating element, digital or analog controller, wood chip tray, water pan, and door assembly․
Models with digital controllers boast advanced features like remote monitoring via smartphone apps and programmable timers, offering greater convenience․ The 20075315 exemplifies this․ Simpler analog models, such as the 20070210, rely on manual temperature adjustments․
Pay attention to the size of your smoker, measured in cooking area (e․g․, 725 sq in for some larger models)․ The chip tray’s size and location are also important; some users suggest bypassing it for better smoke․ Familiarize yourself with the access door – stainless steel versions with windows (like the 20070710) allow for monitoring without opening․
Safety Precautions
Masterbuilt smokers operate with electricity and high temperatures, demanding strict safety adherence․ Always operate the smoker outdoors, away from flammable materials and structures․ Ensure a stable, level surface to prevent tipping․ Never leave the smoker unattended during operation․
Exercise extreme caution when handling hot surfaces – use heat-resistant gloves and tools․ Avoid touching the heating element or interior components while the smoker is on or recently used․ Keep children and pets away from the operating smoker․
Electrical safety is paramount․ Use a grounded outlet and avoid extension cords if possible․ If an extension cord is necessary, ensure it’s rated for outdoor use and the smoker’s wattage (typically 1200W)․ Disconnect the smoker from the power source before cleaning or performing maintenance․ Regularly inspect the power cord for damage․ Be mindful of potential smoke exposure and position the smoker to minimize smoke drift towards people or buildings․

Setting Up Your Masterbuilt Smoker
Proper setup ensures optimal performance․ This involves carefully unboxing the components, assembling the smoker correctly, and performing an initial burn-off to season it․
Unboxing and Assembly
Carefully unpack your Masterbuilt smoker, verifying all components are present against the parts list in the manual․ Lay out a protective covering to prevent scratches during assembly․ Begin by attaching the legs to the base, ensuring they are securely fastened with the provided hardware․
Next, assemble the heat diffuser and place it within the smoker body․ Attach the door, confirming a proper seal․ Install the racks, adjusting their height as needed for different cooking setups․ Connect the drip pan and ensure it’s positioned correctly to catch grease and drippings;
Pay close attention to the wiring and ensure all connections are secure, especially if dealing with a digital model․ Double-check all screws and bolts for tightness․ Refer to the detailed diagrams in your specific model’s manual for precise instructions․ A correctly assembled smoker is crucial for safe and efficient operation․
Initial Burn-Off Procedure
Before your first cook, a crucial “burn-off” is required to eliminate manufacturing residues and oils․ Set your Masterbuilt smoker to a high temperature – typically around 275°F (135°C) – and let it run for 2-3 hours․ Do not add any food during this process․
This initial heating cycle will burn off any lingering protective coatings applied during manufacturing․ You may notice some smoke and a slight odor; this is normal․ Ensure adequate ventilation during the burn-off․
After the burn-off, allow the smoker to cool completely․ Wipe down all interior surfaces with a clean, damp cloth to remove any remaining residue․ This step prepares the smoker for safe food preparation and helps prevent unwanted flavors from affecting your first barbecue․ A thorough burn-off ensures a clean and flavorful smoking experience․
Powering and Connecting the Smoker
Your Masterbuilt electric smoker requires a standard 120V AC electrical outlet․ Never use an extension cord; plug the smoker directly into a grounded outlet․ Ensure the outlet is dedicated to the smoker to avoid overloading the circuit․ Before connecting, verify the voltage matches the smoker’s specifications (usually found on the rating label)․
Inspect the power cord for any damage before each use․ If the cord is damaged, do not operate the smoker and contact Masterbuilt customer support for a replacement․ Proper grounding is essential for safety․
Some models feature a three-prong grounded plug; do not remove the grounding pin․ Once connected, the digital controller (if equipped) will illuminate․ Always disconnect the smoker from the power source when not in use and before cleaning or performing maintenance․
Operating Your Masterbuilt Smoker
Masterbuilt smokers are user-friendly․ Control temperature via analog dials or digital controllers․ Adding wood chips creates smoke; water pans maintain humidity for moist results․
Temperature Control and Settings

Masterbuilt smokers offer varying temperature control methods․ Analog models, like the MB20070210, utilize a dial for setting the desired heat․ Digital models, such as the 20075315, feature precise digital controllers with timer functions and remote monitoring capabilities․
Achieving consistent temperatures is crucial for successful smoking․ Begin with a lower setting and allow the smoker to stabilize before adding food․ Monitor the internal temperature using a separate meat thermometer for accuracy․ Remember that ambient temperature and wind can affect smoker performance․
Different meats require different temperatures․ Lower temperatures (225-250°F) are ideal for slow-cooking tougher cuts like pork shoulder and brisket, while higher temperatures (275-300°F) are suitable for ribs and chicken․ Experimentation and careful monitoring are key to mastering temperature control on your Masterbuilt smoker․
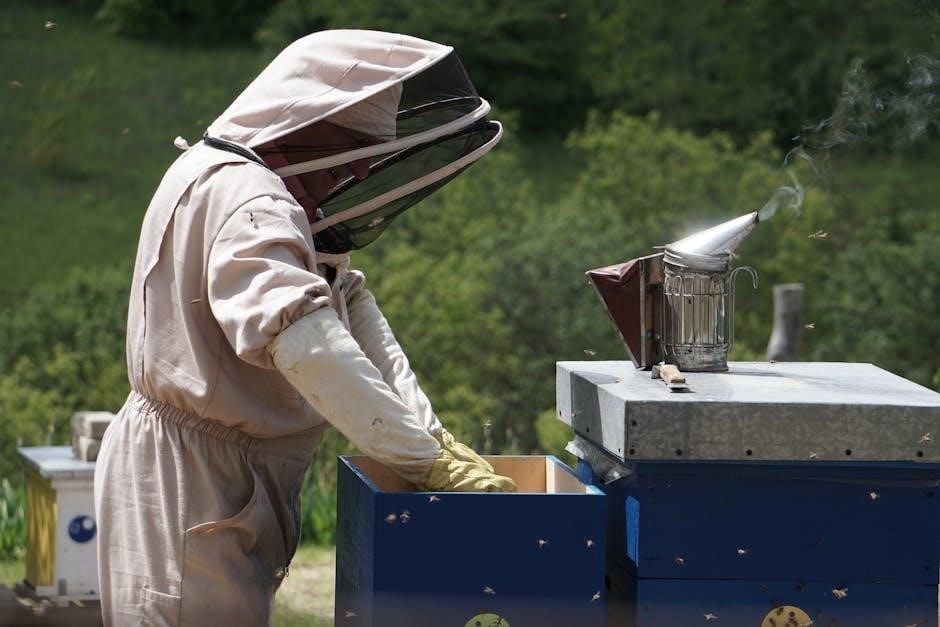
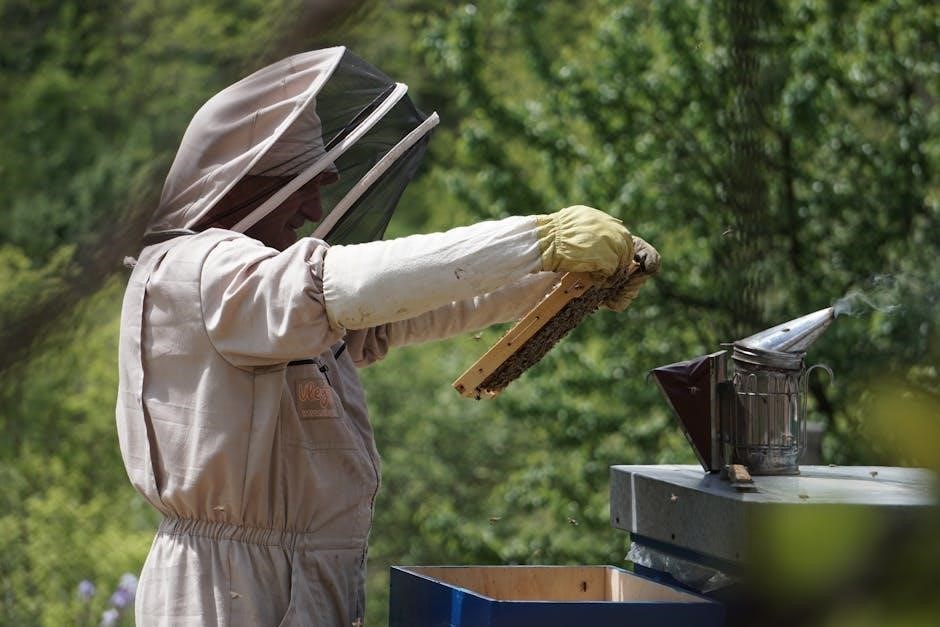
Adding Wood Chips & Smoke Flavor
Masterbuilt electric smokers utilize wood chips to generate smoke flavor․ The standard chip tray can sometimes produce bitter, white smoke; Many users recommend bypassing the tray and placing wood chunks directly onto the heating element for cleaner, more flavorful smoke․ Hickory is a popular choice, but using too much can lead to bitterness․
Experiment with different wood types – apple, cherry, mesquite – to discover your preferred flavor profiles․ Soak wood chips in water for at least 30 minutes before use to prolong their smoldering time․ Replenish wood chips as needed throughout the cook, typically every 45-60 minutes, to maintain a consistent smoke level․
Side chip loaders, like those found on the EAST OAK 30, allow for uninterrupted smoking without opening the smoker door․ Consistent smoke exposure is vital for developing a rich, smoky flavor in your barbecue․
Water Pan Usage & Maintenance
The water pan in your Masterbuilt smoker plays a crucial role in maintaining consistent temperatures and adding moisture to the cooking chamber․ This moisture helps prevent meats from drying out during long smokes and contributes to a more tender final product․ Always fill the water pan with water, juice, or other liquids before starting your cook․
Regularly check the water level throughout the smoking process, especially during extended cooks, and replenish as needed․ Avoid letting the pan run dry, as this can lead to temperature fluctuations and a drier result․
After each use, thoroughly clean the water pan to prevent the buildup of grease and residue․ A simple wash with warm, soapy water is usually sufficient․ Proper maintenance ensures optimal performance and longevity of your smoker․
Digital Controller Functions (if applicable)
Masterbuilt smokers equipped with digital controllers, like the 20075315 model, offer enhanced convenience and precision․ The digital panel allows for precise temperature setting, often in 5-degree increments․ Utilize the “Set Temp” button to establish your desired cooking temperature․ The controller maintains this temperature by cycling the heating element on and off․
Many models feature a built-in timer function․ This allows you to set a specific cook duration, after which the smoker will automatically switch to a “Keep Warm” mode․ Remote monitoring capabilities, available on some models, enable you to track the internal temperature via a smartphone app․
Familiarize yourself with the controller’s specific functions as outlined in your model’s dedicated manual․ Understanding these features will maximize your smoking experience and ensure consistent results;
Cooking with Your Masterbuilt Smoker
Masterbuilt smokers excel at cooking various meats like ribs, pork shoulder, and brisket․ Achieving optimal results requires understanding recommended temperatures and utilizing appropriate wood flavors for enhanced taste․
Recommended Cooking Temperatures for Different Meats
Achieving perfectly smoked meats with your Masterbuilt requires understanding optimal cooking temperatures․ For tender, fall-off-the-bone ribs, maintain a consistent temperature between 225°F and 250°F (107°C ⎻ 121°C) for 5-7 hours, depending on the cut․ Pork shoulder, destined for pulled pork perfection, also thrives in the 225°F ‒ 250°F range, typically needing 8-12 hours for complete tenderness․
Brisket, a more challenging cut, benefits from the “low and slow” method․ Aim for 225°F (107°C) and plan for a lengthy cook time of 12-18 hours, or even longer, depending on the size and thickness․ Chicken and turkey require higher temperatures, around 275°F (135°C), and generally cook in 4-6 hours․ Salmon and other fish are best smoked at 175°F (79°C) for a shorter duration, approximately 2-4 hours․
Remember these are guidelines; internal meat temperature, measured with a reliable thermometer, is the ultimate indicator of doneness․ Consistent temperature control is key to successful smoking with your Masterbuilt smoker․
Rib Cooking Guide
Smoking ribs on your Masterbuilt is a rewarding experience! Begin by preparing your ribs – remove the membrane on the back for optimal tenderness․ A dry rub, applied generously, adds fantastic flavor․ Set your smoker to 225°F ‒ 250°F (107°C ⎻ 121°C)․ Place the ribs bone-side down, allowing the bones to protect the meat․
The 3-2-1 method is a popular technique: Smoke for 3 hours, wrap in foil with a liquid (apple juice, beer) for 2 hours, then smoke unwrapped for 1 hour․ This creates incredibly tender and flavorful ribs․ However, adjust times based on your preference and rib type (baby back vs․ spare ribs)․
Monitor internal temperature; ribs are done when they reach 195°F ‒ 203°F (90°C ‒ 95°C)․ A probe should slide in with little resistance․ Let rest for 15-20 minutes before slicing and enjoying․ Experiment with wood chips – hickory and applewood are excellent choices for ribs․
Pork Shoulder/Pulled Pork Guide
Pork shoulder, or Boston butt, is ideal for pulled pork on your Masterbuilt smoker․ Begin with a generous dry rub, incorporating paprika, garlic powder, and brown sugar․ Set your smoker to 225°F ‒ 250°F (107°C ⎻ 121°C)․ Place the pork shoulder directly on the rack, fat-side up to baste the meat during cooking․
Unlike ribs, pork shoulder benefits from a longer, slower cook․ Expect 8-12 hours, or until the internal temperature reaches 195°F ⎻ 205°F (90°C ‒ 96°C)․ The “stall” – a period where temperature plateaus – is common; patience is key․ Wrapping in butcher paper (the “Texas Crutch”) can help power through it․
Probe for tenderness; it should feel like probing warm butter․ Let rest, wrapped, for at least an hour before shredding with forks․ This allows the juices to redistribute․ Use applewood or hickory for a classic smoke flavor․ Enjoy your delicious, tender pulled pork!
Brisket Smoking Techniques
Smoking a brisket on your Masterbuilt requires patience and precision․ Start with a full packer brisket, trimming excess fat to about ¼ inch․ Generously season with a coarse pepper-based rub․ Maintain a consistent smoker temperature of 225°F ⎻ 250°F (107°C ‒ 121°C)․
Place the brisket fat-side up on the smoker rack․ Expect a long cook – 12-18 hours, or until the internal temperature reaches 195°F ‒ 205°F (90°C ⎻ 96°C)․ The stall is very common with brisket; wrapping in butcher paper around 160°F can accelerate the process․
Probe for tenderness in the thickest part; it should feel like probing warm butter․ Rest the brisket, wrapped in a cooler for at least 2-4 hours․ This is crucial for a juicy result․ Oak is the traditional wood choice, but hickory also works well․ Slice against the grain for maximum tenderness․
Maintenance and Troubleshooting
Regular cleaning, heating element checks, and door seal inspections are vital․ Common issues include temperature fluctuations and smoke problems; address these promptly for optimal performance․
Cleaning Your Masterbuilt Smoker
Regular cleaning is crucial for maintaining your Masterbuilt smoker’s performance and longevity․ After each use, allow the smoker to cool completely before beginning․ Remove and wash the water pan, grease tray, and cooking racks with warm, soapy water․ Avoid abrasive cleaners, as they can damage the surfaces․

The interior of the smoker should be wiped down to remove grease and food residue․ A scraper can be helpful for stubborn buildup․ Pay particular attention to the heating element and chip tray, ensuring they are free of debris․ Inspect the door for grease accumulation and clean accordingly․
For a deeper clean, periodically disassemble components for thorough washing․ Ensure all parts are completely dry before reassembling․ Proper cleaning prevents flare-ups, maintains consistent temperatures, and contributes to better-tasting BBQ․ Consistent upkeep extends the life of your smoker and ensures enjoyable cooking experiences for years to come․
Replacing the Heating Element
Replacing the heating element in your Masterbuilt smoker is a task best undertaken with caution and after disconnecting the power supply․ First, ensure the smoker is completely cool․ Access the element, typically located within the smoker’s body, often requiring panel removal․ Carefully disconnect the existing element’s wiring, noting the connections for correct reassembly․
Remove the old element and install the new one, ensuring it’s securely seated․ Reconnect the wiring precisely as it was before․ Before reassembling the smoker, test the new element with a multimeter to confirm continuity․
Reassemble the smoker panels and reconnect the power․ Always refer to your specific model’s diagram for accurate guidance․ If uncomfortable with electrical work, consult a qualified technician․ A functioning heating element is vital for consistent temperatures and successful smoking․
Door Seal Inspection and Replacement
A properly sealed door is crucial for maintaining consistent smoker temperatures and preventing smoke leakage․ Regularly inspect the door seal for cracks, tears, or deterioration․ Run your hand along the seal; any noticeable gaps indicate a need for replacement․ A failing seal impacts cooking efficiency and flavor․
To replace the seal, carefully remove the old one, often held in place by adhesive or a friction fit․ Clean the door’s sealing surface thoroughly before applying the new seal․ Ensure the new seal is the correct size and type for your Masterbuilt model – consult the parts diagram․
Press the new seal firmly into place, ensuring a complete and airtight closure․ Door problems are a common issue, so proactive inspection and replacement are key to optimal performance․
Troubleshooting Common Issues (Temperature Fluctuations, Smoke Issues)
Temperature fluctuations can occur due to wind, ambient temperature, or an improperly sealed door․ Ensure the smoker is sheltered and the door seal is intact․ Avoid opening the door frequently during cooking․ If using a digital controller, verify its calibration․
Smoke issues, like weak or bitter smoke, often stem from wood chip quality or placement․ Some users find placing wood chunks directly on the heating element produces better smoke than the chip tray, avoiding white, bitter smoke․ Using less hickory can also help․
If no smoke is produced, check the heating element and ensure wood is igniting․ Consistent monitoring and addressing these issues will improve your smoking results․ Contact Masterbuilt support if problems persist․
Advanced Techniques
Masterbuilt smokers benefit from experimenting with wood types and remote monitoring․ Accessories enhance convenience, while optimizing smoke flavor elevates your BBQ game significantly․
Using Wood Chunks vs․ Wood Chips
Masterbuilt smokers offer versatility in wood fuel choices, primarily between wood chips and chunks․ Wood chips, readily available and convenient, burn quickly, providing initial bursts of smoke ideal for shorter cooks or intensifying flavor early on․ However, they require frequent replenishment due to their rapid consumption, potentially leading to inconsistent smoke production and even bitter flavors if they smolder excessively․
Wood chunks, conversely, are larger and denser, offering a prolonged, steadier smoke output․ Placing wood chunks directly on the heating element, as some users suggest, can bypass the chip tray and deliver cleaner, more consistent smoke․ This method minimizes the risk of white, bitter smoke often associated with the chip tray․ Chunks are particularly well-suited for longer smoking sessions like brisket or pork shoulder, maintaining a consistent smoke profile throughout the cook․ Experimenting with different wood varieties – hickory, mesquite, apple, cherry – allows for nuanced flavor profiles tailored to your preferred meats․
Optimizing Smoke Flavor
Achieving optimal smoke flavor with your Masterbuilt smoker involves several key considerations․ Minimizing bitter notes is crucial; avoid overusing strong woods like hickory, as excessive amounts can impart a harsh taste․ Maintaining a clean smoker is paramount – regularly remove grease and ash buildup, as these can contribute to off-flavors․ Proper temperature control is also vital; consistent heat allows for efficient smoke absorption by the meat․
Experiment with different wood types to discover your preferences․ Fruit woods like apple and cherry offer milder, sweeter smoke, ideal for poultry and fish, while mesquite provides a bolder flavor suited for beef․ Ensure adequate airflow within the smoker to facilitate complete combustion and prevent the buildup of acrid smoke․ Consider using a water pan to maintain humidity, which helps the smoke adhere to the meat’s surface, enhancing flavor penetration․ Remote monitoring features, available on some models, allow for precise temperature and smoke control throughout the cook․
Remote Monitoring and Timer Features
Masterbuilt smokers with digital controllers often include remote monitoring and timer functionalities, significantly enhancing convenience and control․ These features allow you to monitor internal meat temperature and smoker temperature via a smartphone app, providing real-time updates without needing to physically check the smoker․ Set custom temperature probes for precise cooking and receive alerts when your desired temperature is reached․
The integrated timer allows you to schedule cook times, automatically adjusting the smoker’s operation․ This is particularly useful for long smoking sessions, like brisket or pork shoulder, ensuring consistent results․ Some models offer Wi-Fi connectivity, enabling remote adjustments to temperature and timer settings․ Regularly update the app for optimal performance and access to new features․ Utilizing these tools minimizes the need for constant supervision, freeing you to attend to other tasks while maintaining a perfectly smoked product․ Remember to verify probe placement for accurate readings․
Masterbuilt Smoker Accessories
Masterbuilt offers a range of accessories to enhance your smoking experience․ Consider a front shelf for convenient access to tools and seasonings during cooking․ Protective covers safeguard your smoker from the elements, extending its lifespan․ Replacement parts, like heating elements and door seals, ensure continued functionality․ Stainless steel doors with windows, like the one for model 20070710, improve visibility without frequent openings․
Additional accessories include meat claws for easy carving, digital thermometers for precise temperature monitoring, and wood chip boxes for consistent smoke delivery․ Specialized racks can accommodate larger cuts or different types of meat․ Explore options for remote monitoring systems if your model doesn’t include built-in connectivity․ Investing in quality accessories maximizes your smoker’s potential and simplifies the cooking process, leading to consistently delicious results․ Always ensure compatibility with your specific Masterbuilt model․